Task 1: exploring a 3D modelling scene
Tools
When I first used Maya, I imported a scale model from unreal engine to make sure my models are the right size to put into unreal engine. I did this by clicking File > Import > Finding the scale.obj > click Import again. You can also drag the scaleman.obj into maya. Once the scaleman was imported, it was too large for the grid. I edited the grid size by right clicking the grid item on the toolbar, and pressing grid options because I didn’t want to ruin the scaling for my model.


I then edited the grid Length and width to 300 which increased the grid size and made modelling easier. I kept the subdivisions and grid lines the same because i only needed a bigger grid to put my models on, and make sure they are accurately placed to get the best scale.


On the toolbar there are various geometric shapes. Clicking any of these will put a shape on the grid. Another way to get these shapes is by clicking Create > Polygon Primitives > Choose Shape.


Navigation
To navigate around Maya, I used the alt button and various mouse buttons to pan, rotate and zoom. To pan you hold Alt + MiddleMouseButton which moves the camera sideways or up and down but keeping the same angle that you are looking from.
Next, to rotate you must hold Alt + LeftClick which allows you to rotate the camera around your object to see all of the angles and sides.
Finally, using Alt + RightClick allows you to zoom in and out from the object to see the entire model or focus on a specific part of it, also scrolling will do the same.
Manipulation Tools
Command Keys
These tools in Maya are the basic tools needed for any model. The command keys Move, Rotate and Scale are all used to change the size and position of a model.
To move a model, you must select the object or parts of the object, and press ‘W’ on the keyboard, then use the middle mouse button to free move the object, or using the axis arrows to move it accurately in one direction.
Next, to rotate an object, select it and press ‘E’ on the keyboard and use middle mouse or the axis handles to rotate.
Finally, using ‘R’ on the keyboard allows you to scale an object. This means to make an object’s width and height larger or smaller.


Other shortcut controls are used for selecting parts of an object. The ‘Face’, ‘Vertex’ and ‘Edge’ select.
To face select, you must have an object selected, and hold right click and drag the cursor onto ‘Face’ select.
To vertex select, you must have an object selected, and hold right click and drag the cursor onto ‘Vertex’ select.
Finally to edge select, select the object and hold right click and go to ‘Edge’ select. Once you have a select tool, you can hold shift or tab on the keyboard to select various different parts depending on the tool you are using.

A vertex is a single point, an edge is two points joined together and a face is four vertices joined to together. Triangles should be avoided if possible as problems occur with shading, however they can be used and are frequently used in modelling characters. Even though a triangle is uneven in edges, two triangles make a square so it is suitable for making models.
Ngons are shapes with more than four sides and these are a problem to import into any engine. while using these. Also it creates bad geometry which will cause normals to be flipped inside, making the model invisible from some angles in a game. This is shown when an object appears black in Maya, so the best thing to do is Ctrl Z which will undo each step until the geometry is correct, then you can continue modelling again.


Task 2: Model and Texture a 3D Barrel
Modelling the barrel
First you must create a basic cylinder, this can be made by selecting the cylinder polygon from the toolbar, or using the create tab > Polygon primitives > Cylinder.


Next, we can resize the cylinder using the ‘R’ key on the keyboard, and dragging the center of the gizmo. Once this is done press spacebar, hover over the front view – Z and press spacebar again. Now select the object and drag it to sit on the black line using the ‘W’ move key.


Now using the edge selection tool you must left click and drag all the vertical edges on the barrel.

Once selected, use the connect tool to to add 2 segments, these are also known as edge loops. Change the pinch to approximately 1.8 in the GUI. Click the connect tool to apply your changes.


Now using the edge selection tool, select the top and bottom edges by holding shift and double clicking each of them. Now using the scale ‘R’ tool, left click and drag the green square.

Now change to the face selection tool and select the top and bottom faces by holding shift and clicking them each. now hold tab and left click and drag over all the faces on the bottom and top of the barrel. Extrude these selections inwards by holding ‘shift’ + left click and dragging the green square to extrude inwards.

With both faces still selected, left click and drag on the Y axis line to pull inwards. This creates a lip on the barrel.

Drag select the vertical lines again using the edge select tool. Now use the connect tool and create 1 segment with pinch at 0. Make sure the segment is in the middle of the barrel, and now use the scale ‘R’ tool to create a bulge in the barrel.


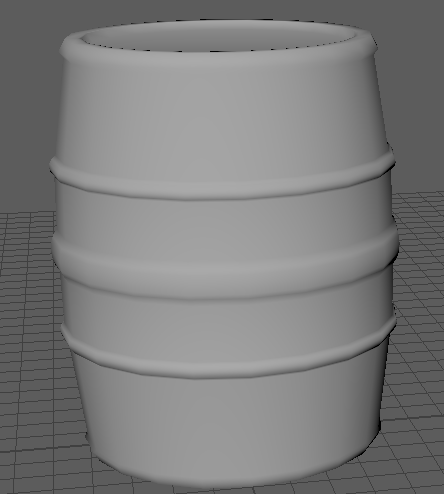
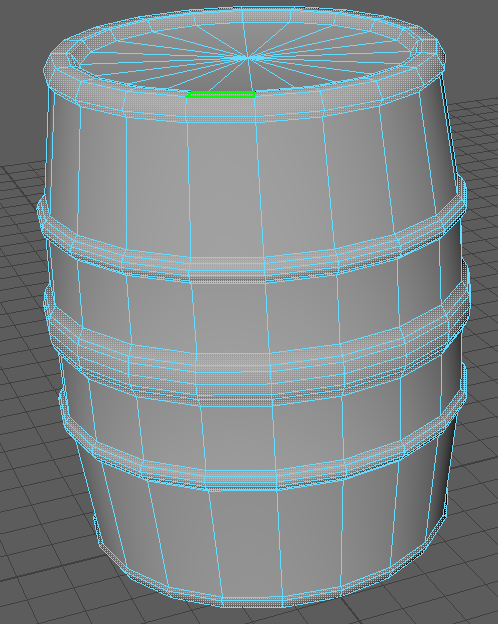
The simple barrel is created, now you need to go to object mode, select the barrel and shade the barrel smooth.


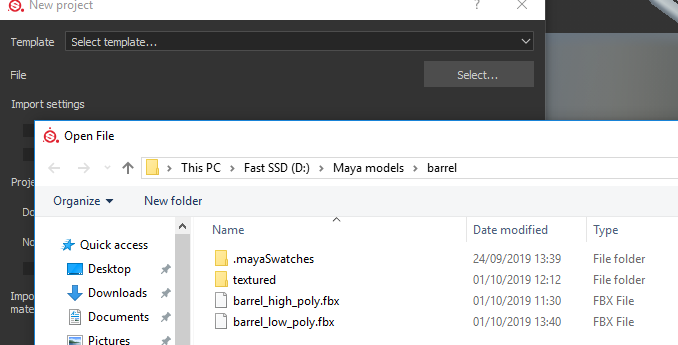
Texture Setup
Now my barrel is created in Maya, I had to use the outliner window to edit my mesh which will soon set it up for texturing. Firstly, I opened the outliner on the left side toolbar, selected the barrel mesh and duplicated it. Then I double clicked and renamed it to barrel_high_poly. Make sure there are no spaces in the name so it can be imported into the game engine correctly.
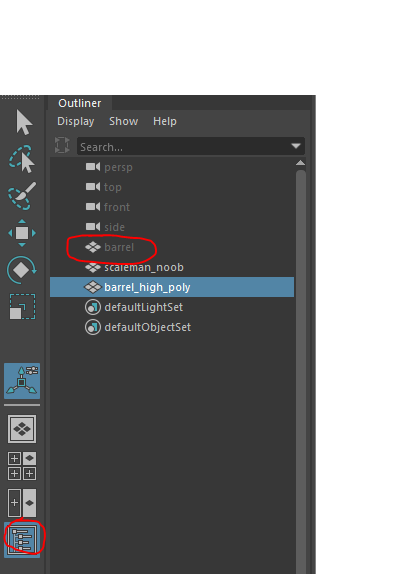
Now I have the duplicate barrel, I can hide the first low poly mesh by selecting it and pressing ‘H’ on the keyboard. This will turn the item name grey transparent in the outliner, and will be invisible on the grid. Once this is done, you may edit the high poly duplicate barrel to add special features like metal strips etc.
Now we have a nicer barrel it’s time to set it up for texturing. Firstly, open the hypershade window by selecting it on the toolbar.

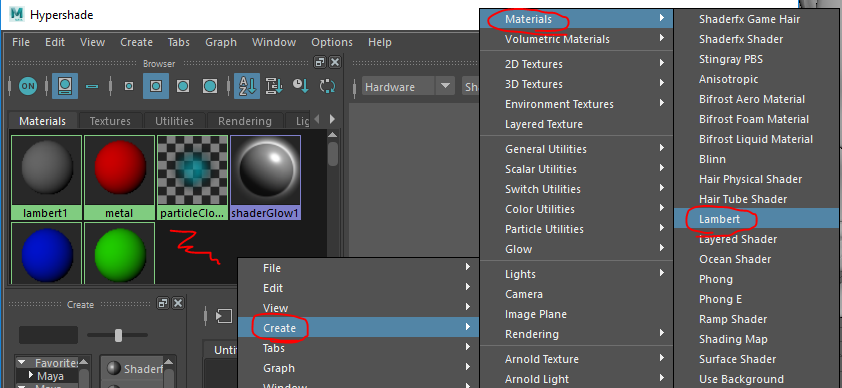
Now that’s open, locate the materials tab. Once you are there, hold right click on the empty dark space > hover over create > hover over materials > and select lambert. Now this creates a ‘lambert 2’.
You can click this lambert and rename it by holding right click and finding rename, and also change the base color. We need to do this so when texturing we can apply materials correctly and accurately to the assigned colors and names.
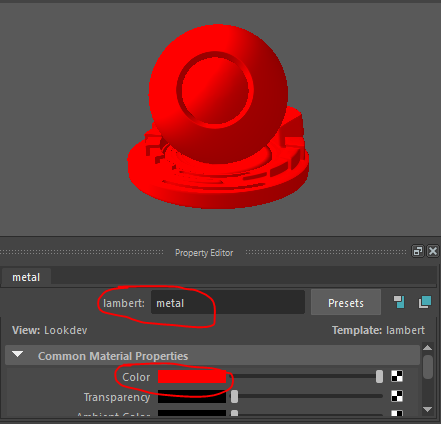
To assign a color and name to parts of your mesh, you must use edge select or face select. For my mesh to select each metal strip I used face select, then go to hypershade and hold right click on your lambert color, and select ‘assign material to selection’.

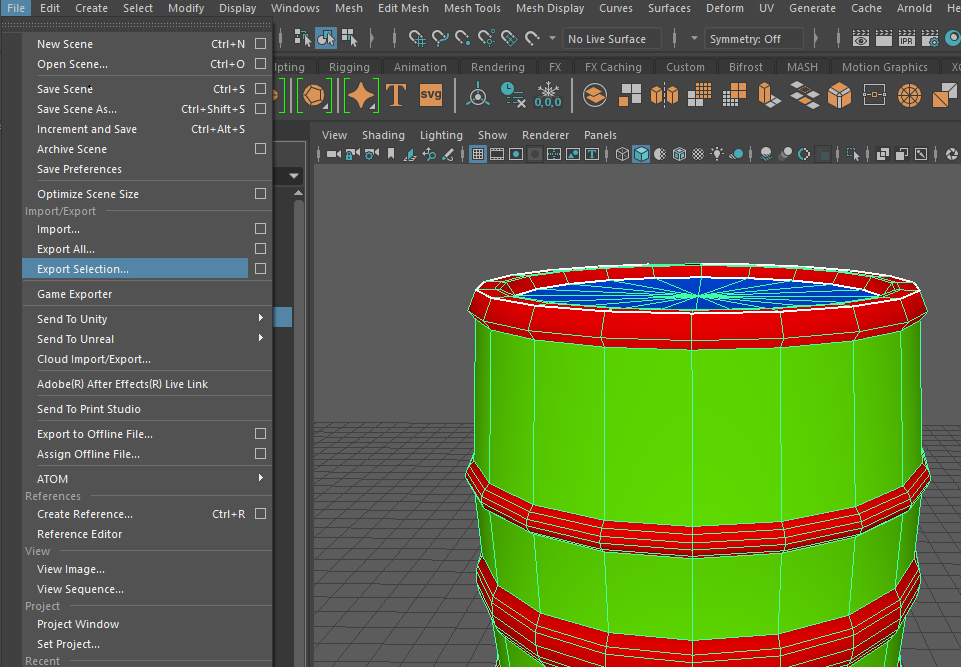
After assigning materials, we must export this mesh into a texturing software. I used substance painter but photoshop will do it too. To export you must select your object > Export selection > export into an appropriate area on your computer.
Texturing
We now have an exported FBX file for our mesh. Now we must open the texturing software such as substance painter or photoshop. For this example substance painter will be used for demonstration.
We have imported our LOW POLY mesh into substance painter. It’s time to texture.
There are many materials to choose from. Also, there are special effects like grunge to make the object look more realistic and that will be done in the later stages of texturing.

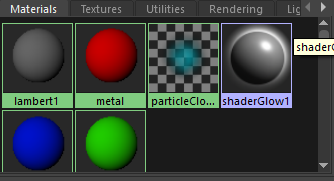
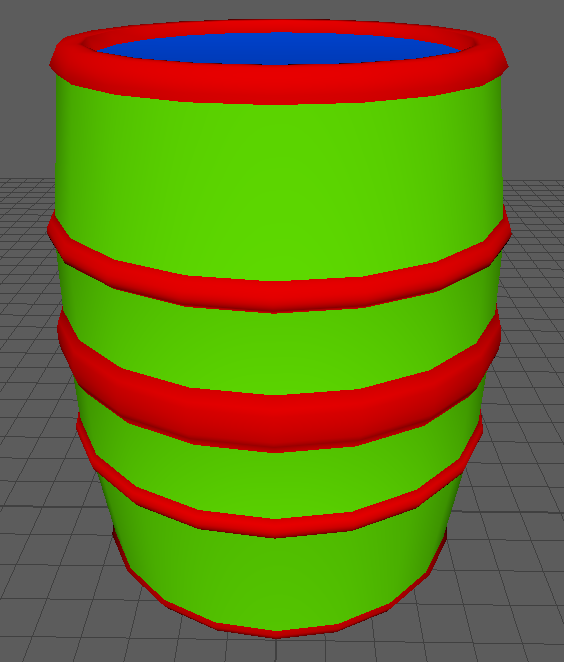
We will be using the colors assigned to materials in maya to make texturing easier. These are the renamed lambert materials from the hypershade window which made the barrel look like this:
First we need to bake the high poly mesh onto the low poly mesh. This gives the details of the high poly mesh on the low poly mesh, and is used to reduce lag in games. Also we must bake the colors to use the color id map in substance painter.
To start baking, go to Texture Set Settings > Scroll down and click bake mesh maps.

Change the settings to the ones below:

Once the settings are changed, add your high poly barrel mesh so the textures can be baked.

Once the meshes are done baking, you should get a barrel looking like your high poly barrel, but the extra edits will NOT be 3D, they should be flat on the low poly barrel.

This is hard to see as a gray model but the textures have been baked on it and will look better colored.
I encountered some issues with baking color id maps with other models.
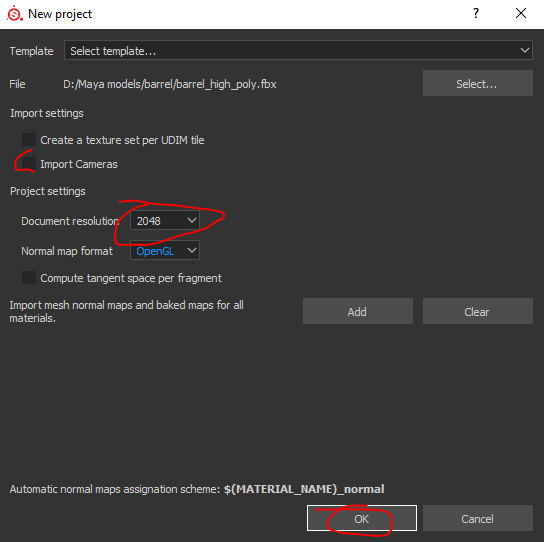
I had to change the settings in the baking window such as:
- Output Size = 2048
- Changing the “Color Source” from Vertex Color to Material Color
- Unticking mesh maps on the left side, except for ID and Ambient Occlusion
You will need to tick the boxes for certain models you are doing to achieve your style. These were problems for MY model.
Now we are going to put a material onto the barrel. I started with american cherry wood material. You must drag it onto the model then it will appear in the ‘Layers’ tab on the right.

By pressing ‘B’ on the keyboard, this will allow you to view and use the color coded mesh from Maya to apply textures as you want.

Once this is ready, right click your material in the ‘Layers’ tab and select ‘add mask with color selection’. Click the color picker icon on the right side of the box then select the color where you want to apply texture.


When you have selected all textures for all colors, click the texture in the ‘layers’ tab, and locate the ‘properties’ tab. From here you can edit the metallic, roughness, base color etc. to get the desired texture.

Finally, adding a grunge effect will make the barrel look realistic and dirty. This is an optional choice but works well for games with conflict or just a nice touch to the environment.
To add grunge, right click on a texture on the ‘layers’ tab > click ‘Add Black Mask’.

From here, right click the black mask and add a ‘Fill Layer’.

The fill layer has a property called ‘greyscale’ at the bottom. Click and drag the grunge effect from the grunge texture tab on the bottom of the screen into the ‘greyscale’ box. This will apply the grunge effect to the barrel and create the effect like mine:

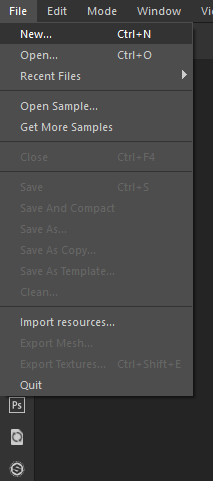
Task 3: Exporting into Unreal Engine 4
First we need to export all of our textures so we can render the barrel in unreal engine. We start by opening the textured barrel in substance painter.
Now we change the channel to ambient occlusion using the drop down on the right.

Now it’s time to export the textures. Click File > Export Textures. In the config list in the export window, choose ‘PBR MetalRough’.


Now select an appropriate folder to export to, and press export on the window. You can now open the folder and see all the textures in there which will be used in unreal engine soon.

We need to copy the low poly barrel into the same folder as our textures so it is possible to render the barrel in unreal engine.

Finally we must export textures as a 2D View. So repeating the steps to the export textures window, we are going to change the config drop down to ‘2D view’. Export this to the same folder as everything else.

It may be named something else other than lambert1, but always has ‘2D_View’ at the end.
It’s time to import and render in Unreal Engine 4. First open the software, and create a new project in 3rd person. This is just a test ground for your barrel. Once your project is open, we need to drag and drop everything from the export folder to the content browser in unreal. Just drag select all, and drag and drop into it.

Once you have transferred the files here, a window will show, and on this you just click ‘import all’.

This is what I got for my barrel. The light blue picture is my mesh. This I will drag and drop into the unreal engine game window and the barrel will become part of the game.

Next we need to render the model. Double click the picture with a green bar as this is the mesh base layer.

This window will show, and you need to delete the ‘Param’ box by right click and delete.

Now the textures on the bottom window are labelled as ‘Base color’, ‘Metallic’, ‘Roughness’ and ‘Normal’. One at a time drag and drop these into the grid and connect to the right texture. The textures are named in the folder used to drag these files into unreal engine, so use that to see which texture sample connects to the properties of the barrel.


Now click the Apply button to render the barrel’s textures.

The barrel in the world will be textured like in substance painter and it can be used for the game you want to create.

Task 4: Evaluation and Upload

Uploaded on Sketchfab.com <— Click to see my models on Sketchfab
Evaluation of 3D Barrel
I can make a much more detailed barrel and better looking than this one. This is good for keeping a low poly count as we have baked textures and I am happy with it as my first barrel in Maya.
I have done well with the texturing as it looks like a realistic barrel to an extent.
I can improve this barrel by adding more detail to the high poly and baking that on.
I found UV unwrapping hard as it was my first time trying. I asked for help and tried myself which helped me learn what to do, and now I can unwrap many other models I have made which are much harder than a cylinder.
Advantages and disadvantages of Maya modelling tools
Extrude:
Advantage
Extruding is a great tool for adding geometry onto a certain area of the model. This tool is useful for creating more vertices for better and more specific modelling. It is also a very efficient way of duplicating geometry to make modelling more accurate as it connects edges or vertices automatically.
Disadvantage
The problem with using extrude is it creates Ngons. These are shapes with more than 4 sides which look glitchy and create all types of trouble in editing meshes. This includes edge flow disruption which makes selecting and editing edges harder as they could be overlapping. Also, extruding by mistake can cause there to be extra geometry where it isn’t needed, and this makes the mesh glitch in some areas or appear black and can be hard to remove if you notice it too late.
Connect:
Advantage
Similar to an edge loop the connect tool can split geometry by inserting an edge from 1 edge to another, 1 vertex to another or 1 face to another. I use the connect tool lots as it snaps straight to the middle of the selected components, and can be connected between as many or as little edges, vertices or faces as you want.
Disadvantage
With bad geometry like Ngons, the connect tool can be disrupted and appear like this


This stops the flow of the connection and it creates an uneven edge as there were extra edges which we didn’t notice were selected. The connect tool requires you to manually select the components which are going to be connected, this is time consuming and frustrating if the wrong parts are selected.
Unfold:
Advantage
Unfolding UVs on maya reduce the distortion of the texture map which allows the texture to wrap the mesh accurately. This is good as the textured model will not look extremely stretched and messed up in game like this

Disadvantage
Unfolding a UV shell will not always go well. This is usually shown in modelling things which are very high poly

This is a result of not unfolding the mesh correctly. If it hasn’t been cut in the right places, the UV shell will overlap itself and distort in many ways when you press the unfold button. This shows the texture map to be stretched like this. They must be equal squares.

Cut:
Advantage
The cut tool allows us to cut UV shells from certain edges or vertexes which create a more accurate unwrapping. You can apply as many cuts as you want.

Disadvantage
The problems with cutting is it is time consuming to decide where to cut. If you are unwrapping a mesh, you may need to keep cutting and unfolding it until it is all accurate. Sometimes cutting an edge doesn’t work how you want it to, and you need to re cut somewhere else so this will be frustrating.
Move:
Advantage
This allows you to move objects quickly and accurately using the axis handles. You can also move components of the mesh like vertices, faces and edges to make specific adjustments to the mesh.
Disadvantage
If the move tool pivot is not in the center of the geometry, then the accuracy of moving it is reduced and it makes everything harder to position as it feels like the movement is delayed.
Sew:
Advantage
Sewing allows the cut areas of a UV to be rejoined with the component of the mesh it was cut from. This allows the UV texture to flow onto another part of the mesh instead of cutting it off then starting the texture again. This flow creates a cleaner texture.
Disadvantage
When components are sewed together, it can sometimes distort the texture map as some parts of the mesh may not be unwrapped correctly, so sewing can ruin the texture if it is done carelessly.
Target Weld:
Advantage
I use target weld lots and it is great for fixing areas where geometry overlaps and unwanted geometry can be welded together from the edge or vertex.

Disadvantage
When you have 2 objects inside eachother, welding the vertices is hard as you can’t move the camera to find the other vertex if 1 is inside the other object. This means you have to move objects around to weld then move it back to the original position which is time consuming and changes the model from the original positions you put it in.

Scale:
Advantage
We can accurately and quickly shape to a reference image by scaling to it’s lines, or we can just scale from any component of the object.
Disadvantage
Scaling is constrained to the axis handles it has so you need to extrude and do use many other tools to get the right shape sometimes.
rotate:
Advantage
This tool is amazing for making objects angle how you want so it can be pefectly flat or it can be rotated however you want.
Disadvantage
Sometimes the object can’t be rotated accurately in the perspective view so you must switch to a front, side or top view to use the axis handles correctly. Also, using the panel on the bottom right can be confusing.
Hold right click panel:
Advantage
This is very fast for accessing the most important things like component selection and modelling toolkit by using shift + hold right click. This makes modelling easier as you don’t need to click certain windows to use something like in 3Ds Max, and this can make the screen less cluttered as you know shortcuts for tools so can close some windows.
Disadvantage
Users can struggle with using shortcuts and it will be hard to learn so many hotkeys for a software. Also, the user may choose something from the panel by accident, and it can mess up things if you don’t know how to fix a misclick.


Limitations of 3D modelling
Ngons are shapes in a mesh with more than 4 sides. They can cause many issues for modelers. Smoothing is an issue with Ngons as it can cause a bumpy texture in parts of the model, and also some black geometry. You mostly see Ngons after using a Boolean difference.

Another problem with models is they can’t display the exact features of a complex real life object. This is not a major problem but if you don’t get the desired model then it is frustrating.
Tri and poly counts are shown by clicking Display > Heads Up Display > Poly Count

These are used because if a object exceeds the limit of vertices in a game engine it will not be accepted into the game engine, or the textures will render extremely slow in game.
Smoothing an object will constantly add vertices to the model. This will make your game very laggy if you have lots of models with lots of vertices. For example go to Maya, load a primitive sphere with the divisions on x and y axis to the max. It may take time to load and Maya may lag.
This is the reason we keep models as low poly as possible.
Baking textures is also a limitation. This doesn’t allow you to get the true design of your model from all angles. Baking is good for reducing poly counts but it is recommended for distant objects as close up they won’t look aesthetically pleasing.
Choosing a 3D modelling software
Autodesk Maya:
Maya 2018 is the software I am currently using and it is incredible with it’s modelling tools. Maya is originally a animation and texturing software and the animation tools are very advanced and the rigging tools allow for more complex rigging which makes better animations.
Paying for Maya is expensive, but it is definitely worth the money if you are professionally going to use it in a business for game or film development. It costs $1505.00 a year.
Autodesk 3Ds Max:
Also owned by Autodesk, Max is a software designed for modelling. The easy material setup means it is best fit for materials and rendering. This means it’s modelling tools are better than Maya’s, however the animation side isn’t as advanced. Some people would choose 3Ds Max over Maya for animating and modelling, this is just which you prefer.
Max is also expensive at a price of $1545.00, but it is definitely easier to learn as a modelling software and is used by many large gaming companies as it’s tools are easy to learn.
Blender:
Blender is the first software I learned as it is free and a very small file to download. In my opinion this is a very basic software for beginners to use, and all the tools are so easy to use and took me about 4 days to learn what I was doing. You can animate in this too, but Blender is not as advanced and consistent as Maya or Max.
I would prefer using Maya as I have learned more about how to texture and UV unwrapping, but if you learn blender it can be very beneficial.
In my opinion, Maya should be used for modelling and animating due to it’s shortcut system and easy to learn hotkeys. Once you learn this it’s basically the same thing as any other modelling software but faster. Animating system is the best too for 3D animation, so this software is a must use for professional use.
