Application, Exploration and Realisation in Art and Design
TASK 1: RESEARCH
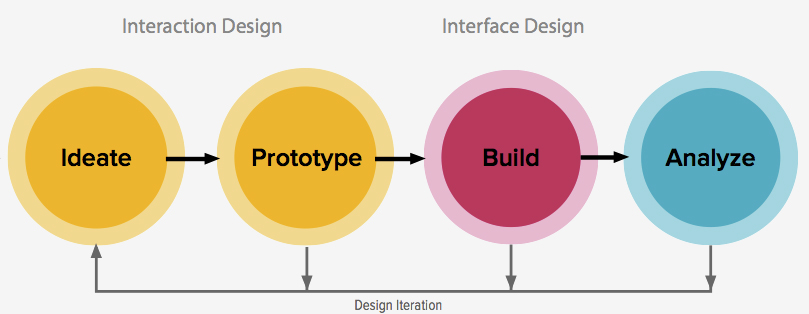
What is iterative design?
These are the stages of iterative design. In the Planning stage, you brainstorm ideas and create sketches of the ones you like most. You will think about the target audience and the style of the model. Then you decide which one is the best and improve on the sketches until you are ready for the next stage. Prototype is creating the model, and finding problems with it then improving the model until you figure out what it should look like. The Build stage begins when the prototype is made, you will continue modelling and working on the prototype until it becomes the final model. Then you unwrap and texture the model and continue the process until it is done. Analysis begins during the Final Build, you should be looking for Ngons, bad topology and bad UVs. Then review the textures, if they are low resolution then the UVs need to be improved, or the textures could be changed if they don’t suit the model like you thought they would.
TASK 2: BRIEF PROPOSAL
Why do I want to create my chosen asset?
I want to create something more sci-fi, rather than organic or hard surface models based on real life. I haven’t made anything like it so it will be fun. The reason I am doing this is because I think it’s an interesting concept for a game. I could make a scene with the character and extra props that suit the style. I can rig it too. This is a character model, so the tri count is allowed to be higher than a prop.
What am I making?
This is a unique asset which is designed to be used in a 3D puzzle platform game or regular 3rd person game. The game would be a similar art style to limbo, using a mixture of Film Noir, and German Expressionism to convey a dark, sinister tone. Mainly black, white and grey and browns. It could also be used for an animation movie like “9”, the character fits in with the theme of a post apocalyptic world, where robot machines have taken over. The model would be set around 2040 when machines, robots and strange beasts have taken over, wiping out humans.
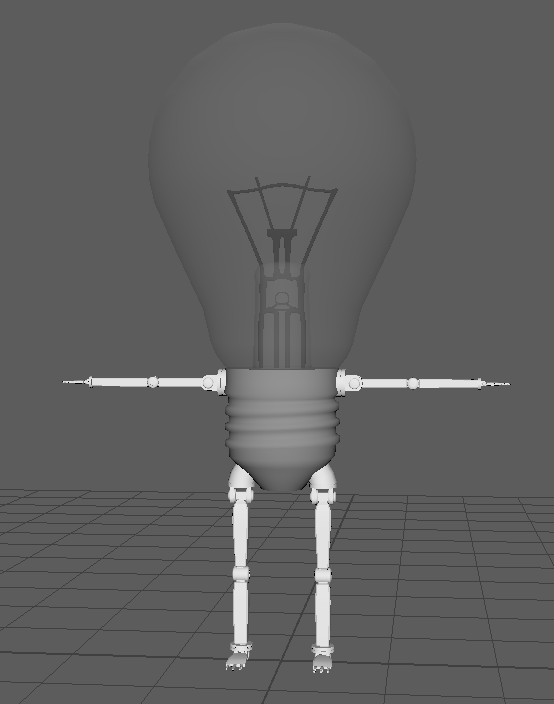
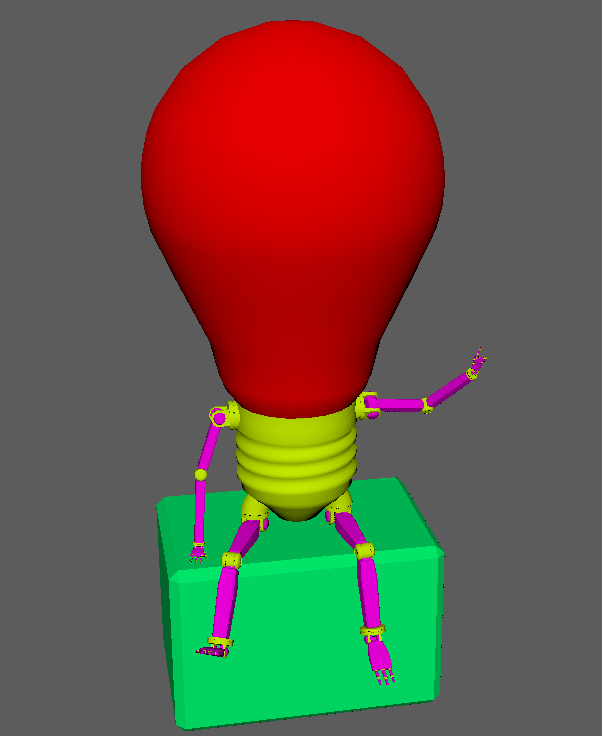
The character is a Light Bulb figure, with arms and legs proportional to the human body. It emits light from it’s torso which is the light bulb. The arms and legs are in shaped like cuboids, fingers and toes too. It is a robot like design, with many mechanical parts. The joints are visible to be a spherical shape. The body is designed to look like an old school, beaten down robot with the light bulb as it’s main body.
Once everything is done, I will use this model to create a playable character in Unreal Engine 4. The model is aimed towards 12+ as there will be blood and some violence in the game, the model may have blood on it in a realistic style as the game progresses, so I will texture it twice.
I will use the limit of 20,000 tris. I will use most topology on the light bulb to make it very round and smooth, this will allow for better reflection and refraction of light in the bulb, I am going for a photorealistic look.
What texture maps will I utilize?
I will use Colour for the base colours of each textured part.
Metallic map for the robotic body, as it will be using a metal material, this will help display the correct reflectiveness.
Roughness map will determine how glossy the surface is.
Ambient occlusion will help to detail the crevices and areas that are small on the character’s body such as fingers, between joints and adding depth to the spiral bit of the light bulb.
Normal map and height maps used to fake screws, dents or scratches in the bot’s skeleton.
Opacity map will be used to make the light bulb glass transparent.
Emissive map will be used to give the glowing effect inside of the light bulb.
I will use a high to low poly bake on small screws, dents or scratches to show wear and tear of the robot as it is progressing in a harsh environment. I want to keep large visual things 3D as modern computers are more powerful, and are able to run games a lot faster. This doesn’t mean I can overload the model with polygons, but I am working with 20,000 tris which is enough.
How do I feel about this model?
My biggest challenge will be rigging because I am learning as I do it, and the skinning is what I struggle on. It shouldn’t be as hard as an organic character as the parts all move in hard straight lines, as it is a robot. This means the joints will roll and rotate with freedom without worrying about deforming any other body part other than the one I want to control. This means I will use the FK motion for joints. but I might use IK for the fingers and toes.
I am most confident with modelling, unwrapping and texturing. These processes have become easy for me and I improve with creating challenging models in my spare time.
This is something I want to create, it is an interesting concept that I haven’t heard of before and it is going to take a fair bit of time to complete, but nothing I can’t handle. I will have time for another model after this.
Process
I started by inserting a reference image of a lightbulb into Maya. Create > Free Image Plane > select image

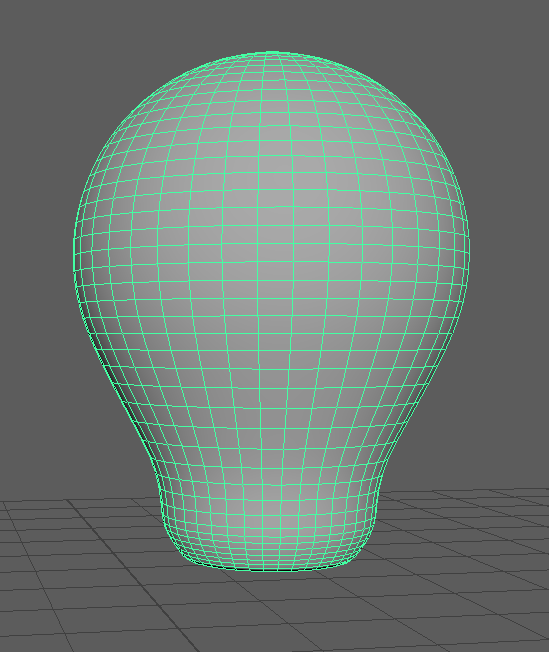
Then I used a primitive sphere and scaled it to fit the top shape of the image.

Using the move and scale tools, I shaped the sphere to fit the lightbulb glass shape.

I had to add geometry in using the edge loop and connect tool so I can get a smoother shape, shading the object smooth also helped.

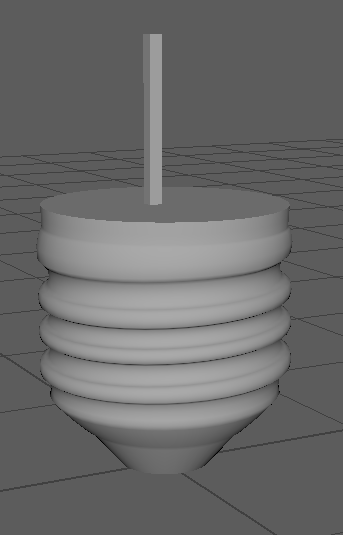
The cylinder was used for making the metal screw part. I strategically added geometry using edge loops to extrude and shape the screw.


I rotated the screw ridges to be at an angle like a real lightbulb.
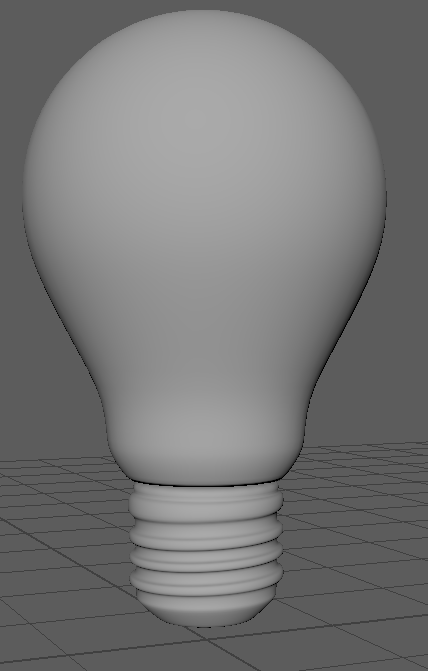
Then I reshaped the bottom and used the fill hole and poke to create a filled circle at the bottom.

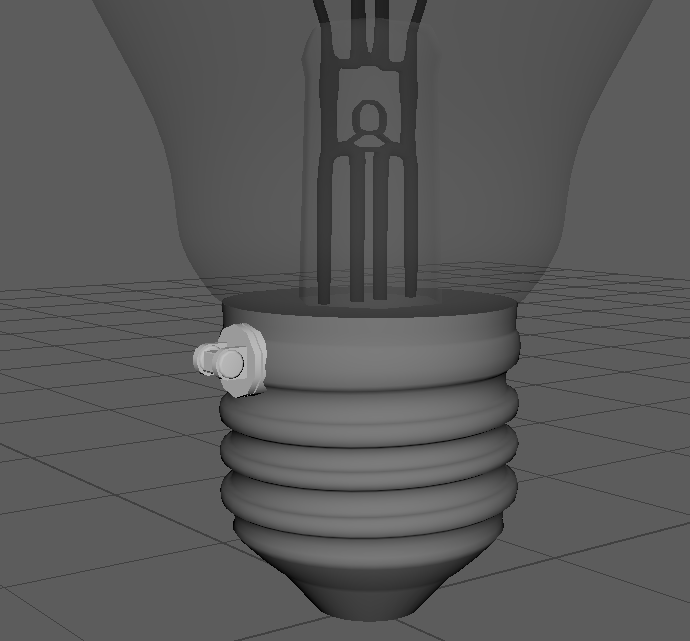
Next I had to make the conductor and glowing part. I started with a cube and shaped to the image. I used the move and rotate tool alot. I extruded parts out too.


After making a half, I had to mirror it. A problem occurred that I realised in the unwrapping stage, there was lots of geometry in the center of each join. There were 8 faces on each part that joined because I bridged the borders. Instead I should have chose to not join and then merged the vertices which I had to do after deleting the geometry.

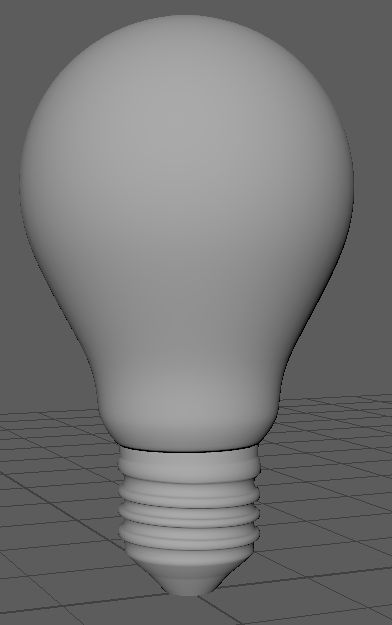
The conductor was done, and I made the glass part around it using a cylinder.

Now the main bulb was complete, I had to create limbs. I started with the arm and it was hard to decide how it should look and function. There was lots of thought into the limbs as it needed to make sense how they move, they couldn’t just move without visible functional parts. I designed another arm after and continued developing it until I had a thought of making it like a robot arm. A bit of engineering went into this it wasn’t as straight forward as I thought.

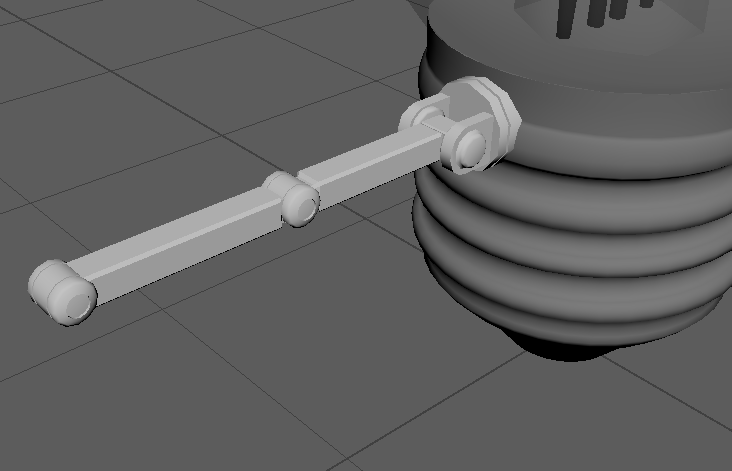
First arm was a ball in socket which could move in all directions. I didn’t look good, and didn’t make sense how everything would fit together. This is when I decided the second arm would be good. Like a robot arm, it rotates 360° in both directions, just like making a big circle with your shoulder, but that is only for 1 direction. The second part will allow for rotation like how our shoulder moves up and down. The elbow doesn’t need to twist so I just used the bending part. The wrist is like the shoulder.


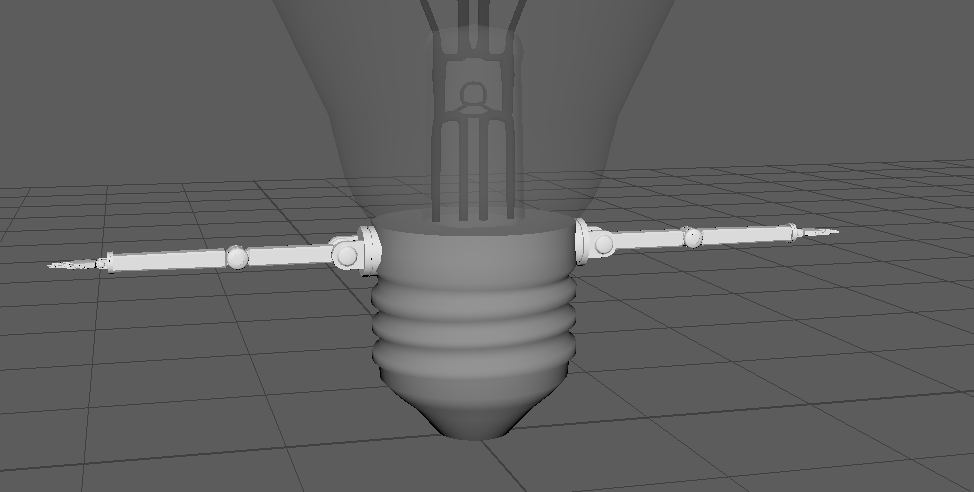
I duplicated the arm and used it as the leg, it required some resizing and changes to look more like a leg. There are thicker upper and lower legs to look like it has muscle structure so we can tell its a leg. They function all the same as the arms. The foot had to be reshaped to be longer and slimmer, also I made a suspension mechanism on the heel to be springy while the character runs, it also makes it look more mechanical.

The UVs were very simple, as the shapes were really just cubes and spheres. It didn’t take long. The layout didn’t matter because most of the pieces are small and they will not be easily visible, such as the fingers and toes. I made sure none were overlapping by setting the pixel distance to 5 pixels.

Next I duplicated the model and renamed it. I used the hypershade to colour the model and get it ready for a high to low poly bake

I wanted to texture this model just to test. I used the high to low poly baking method to texture this.

After texturing, I had to rig the character. I started by adding joints to the correct places and parenting them.
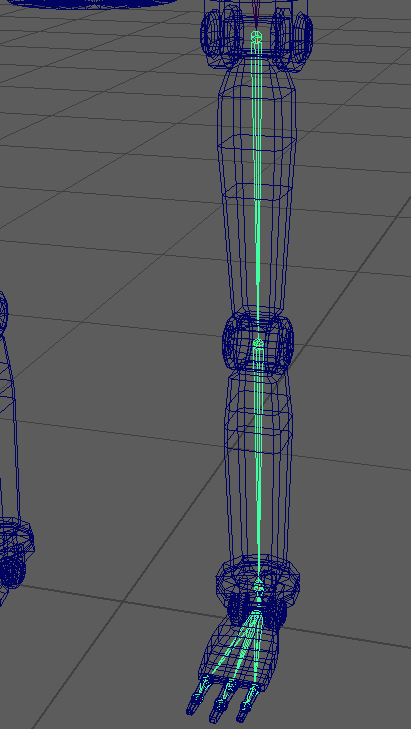
Once all the joints were in place, I had to orient the joints to the correct axis to allow for straight rotations, otherwise the rotation gizmo would be at an angle which would make the rotations much harder as they are not straight. To do this i used a MEL script called “cometJointOrient.mel”. It opens a GUI which has orientation options, and I made sure the Y axis pointed up or away, and the X axis pointed towards the next joint.

Once the skeleton was complete, I bonded the skin to the mesh, which allowed the joints to deform the mesh. Starting off, I made the head joint flood black. The spine joint Flood white on the whole body as there are no other spines in the character’s body. Now I had to paint each joint and the geometry it follows to make sure the joints move the correct parts. There was no need for smoothing as this is a robot which moves in separate movements, I did FK instead of IK because it made sense for a robot.

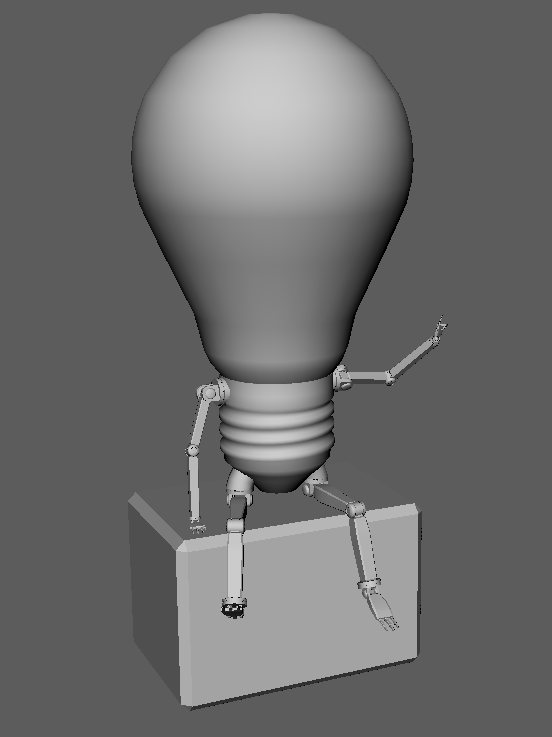
Now I could pose my character. There were some places that the paint did not reach, so it deformed strangely. I had to go back and paint mainly the finger tips and between the large joints where it is hard too see. To make sure I didn’t paint over onto another joint, I used the lock feature on each joint to block out anything that is trying to cover what is already there.

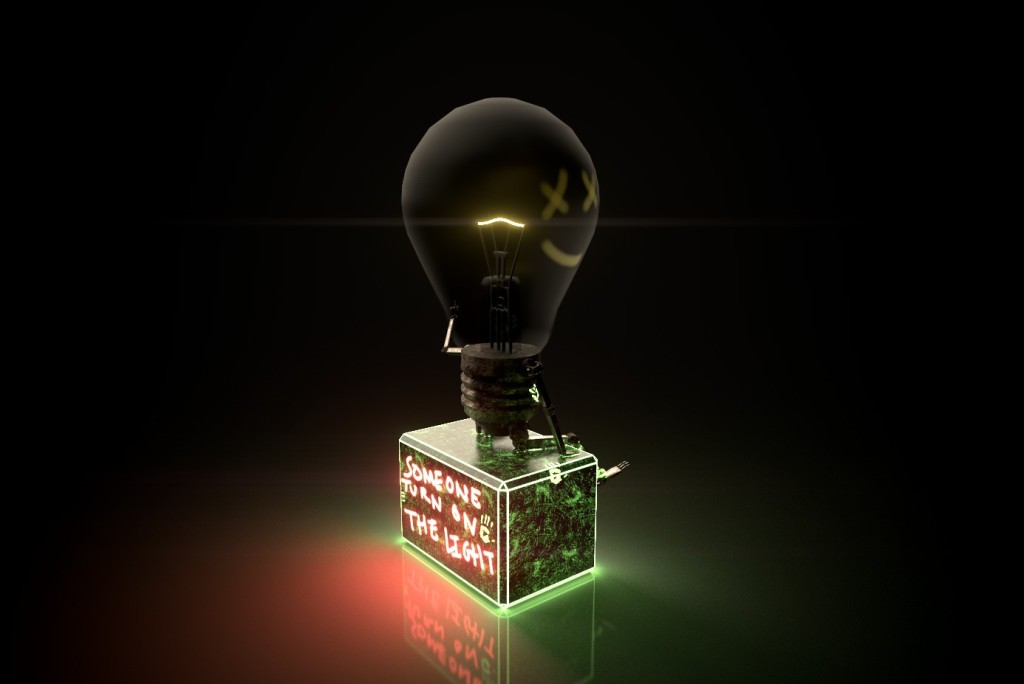
This is the final pose. I inserted a cube and beveled it, keeping the edges hard for a glowing outline texture in substance painter.
I exported this as a OBJ file, as using FBX will export the skeleton too which forced the mesh into the T pose again. OBJ will remove the skeleton, and take only the 3D object how it appears in Maya.
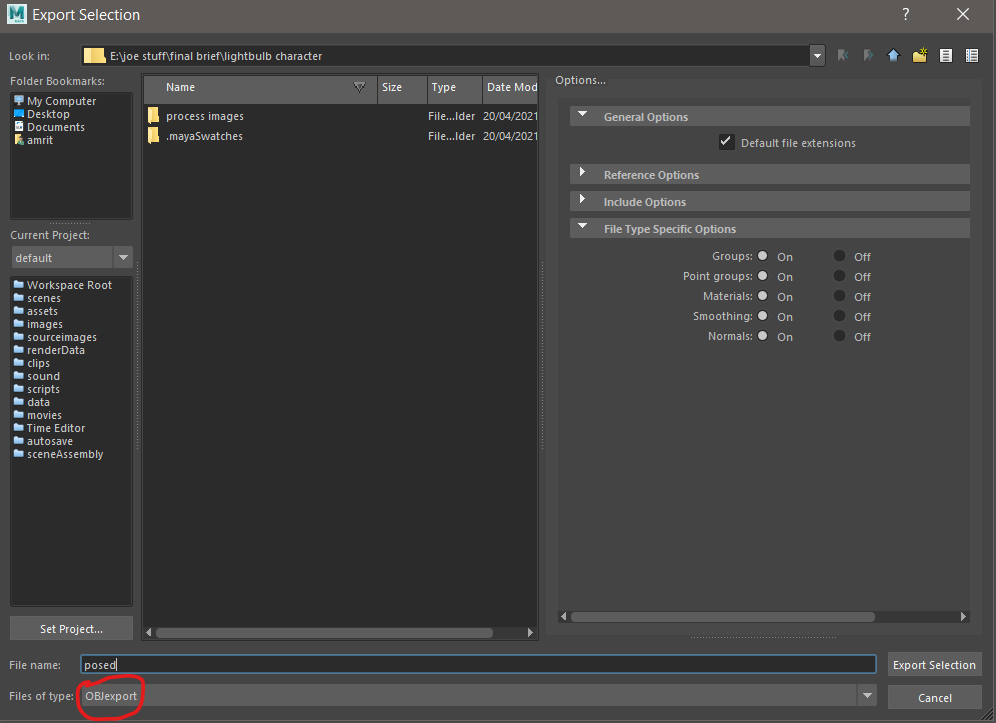
I did the same export with the High Poly.
Texturing didn’t take long. I had to keep tweaking the material properties to make it perfect.
Here are the final renders. PNG removes post processing effects and the background to focus on the main object in the scene.


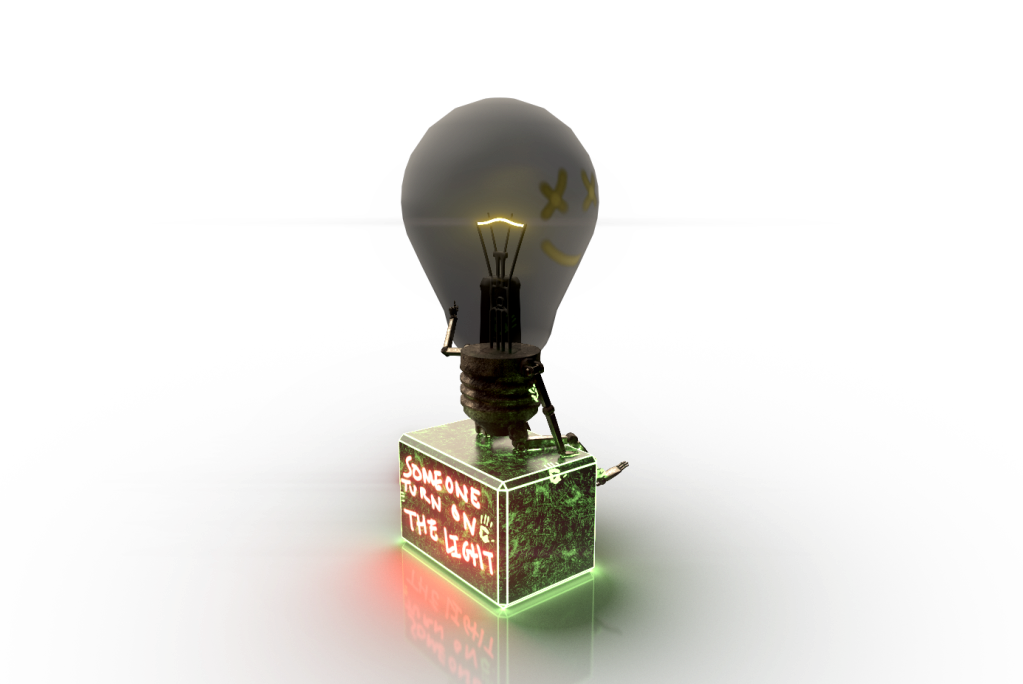
I decided to create a scene using another lightbulb. It is a shattered lightbulb with broken limbs which appears to have been dropped and broken.

Texturing took longer here because I had to find them and import. The paint tools
